Freelensing, Macro Freelensing, and the Sol45 | How to achieve dreamy shift focus images
We would like to welcome Stephanie Granger to the blog today. She is a loyal, present, beautiful member of our community and we are grateful for her everyday. As an Unraveled Expert Artist, we hope that this is just the beginning for her here. What inspires us the most about Steph is her willingness to think outside the box and KEEP learning. She is always trying new techniques and sharing her art.
For this post she’d like to explain how you can master the art of freelensing.

About the Author.
Stephanie is a Single Mother by Choice living in western Massachusetts. Her love of photography bloomed after having her son and wanting to document as much of his life as she could. She completed a 365 day project last year and still doesn’t allow her camera to stray too far from sight. Her love deepened when she discovered how beautifully she could express herself through self portraits, especially when incorporating double exposure, and particularly when she didn’t feel beautiful at all.
For more inspiration:
Instagram | Website | Facebook


What is Freelensing?
Freelensing is the act of detaching your lens from your camera body then holding your lens up to your camera body and shooting without your lens attached. When done correctly, you will capture a sliver of the picture in focus with the remaining image out of focus for a soft dreamy type of effect
I shoot with a Nikon camera which requires a trick to open the aperture on your lens, so I never really used the freelensing method, I lately learned the trick and have been practicing this style of shooting frequently. In the video below, I show you how to use a Nikon lens to freelens. In the video, I use a small rubber band to keep the aperture lever open, other artists use little pieces of paper or they break lenses intended to freelens with. Please note, once the lens is broken, you can no longer mount it to your camera properly and I am not recommending this unless you purchase a lens specifically for freelensing.
Check out Steph’s BTS Video:
Freelensing vs Sol 45 - What’s the difference?
Before I knew the trick to freelensing with my own lens, I purchased a Sol45 from Lensbaby. The Sol45 allows for a similar outcome to freelensing. Here your lens is physically attached, but you are able to move the lens up and down and back and forth in order to try and find the focus. This lens is also a manual focus so it’s a bit tricky to learn but once you do, it results in beautiful blurry images with the focus right where you want it.
The benefits to using the Sol45 verse freelensing with a lens you already have are:
If you are accident prone or worried about dust particles getting into your camera body, the Sol45 is physically attached to your lens and offers more security
If you want to take self portraits, freelensing with your own lens requires you to have to manually hold the lens, giving you less freedom than the Sol45.
The blur between the two lenses are different and you may prefer the Sol45 results.
If your camera doesn’t allow you to fire the trigger without the lens attached, you can still achieve a freelens look with the Sol45.


Tips for Freelensing
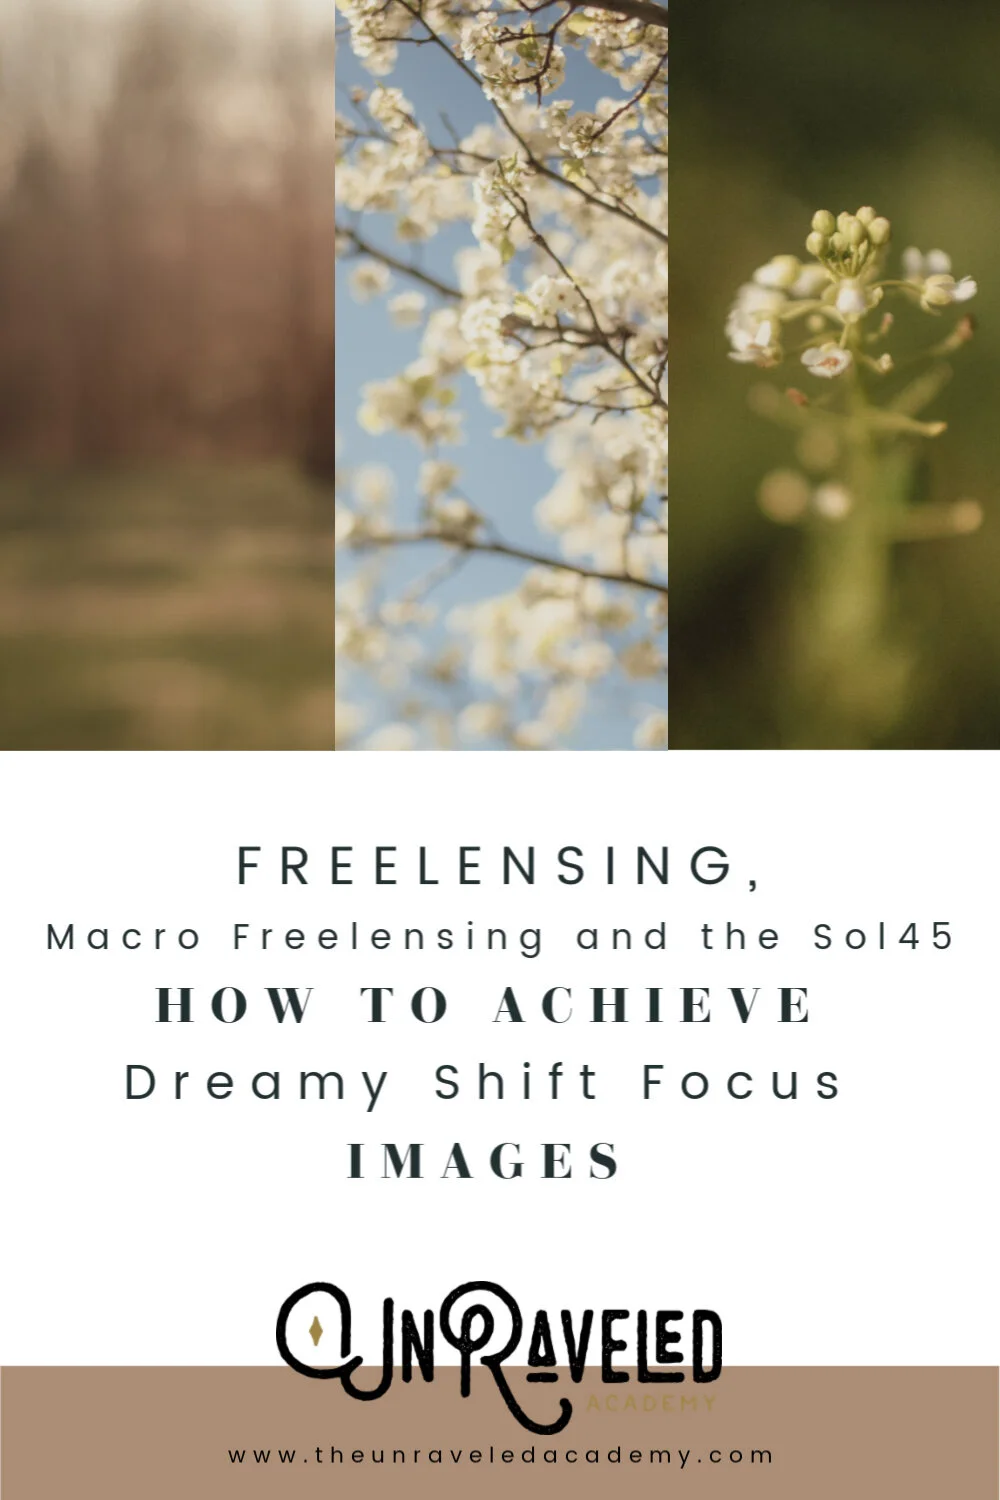
Common lenses for Freelensing are the 50mm and 35mm. I find with my 35mm I can either focus on something specific or pull back and get an entire image with the goal to catch the focus somewhere in the picture. It’s hard to explain but here are examples:


The two images above were freelensed with my 35mm lens. This is an example of where I moved the focus ring in and tried to focus specifically on the tree branch. In the picture of the branch, I set the focus ring to the infinity symbol and captured the whole scene. I then focused in on just one set of branches. Same lens, similar focal length away from my subject, but different outcome.
When setting exposure for freelensing, use the triangle the same way you typically would if your lens is attached. If you are just starting off, you can attach your lens, get your settings, and then take it off if that helps. You will eventually figure out the more you practice with it, what the best settings are.
My 50mm is also a great lens to freelens with. It is the one I used in the video above. I find due to the size, it’s much harder to move the focus ring while trying to juggle everything else. If you can, give it a try, if not, set to the infinity symbol and see what magic you create.
And last tip, do not delete anything in camera until you cull on a screen. I believe you need to see the images, blown up, to really appreciate what was captured in focus. Let that sliver of focus be your story.
Now that you can Freelens, you can also Macro Freelens
Macro Freelensing, is taking your unattached lens and flipping it the other way and shooting with the backside of the lens pointed at your subject (if you have a Nikon, this would be after you open the aperture). The results are a stunning up close shot with some seriously beautiful blurr. In order to do this, you have to get very close to the subject. You won’t even be able to see an object through the lens until you get about 1-2 inches from your target. Then you need some steady hands because the focus will shift very quickly. The images tend to be underexposed if you don’t change any settings between freelensing and macro, so make sure to adjust accordingly.


So in conclusion, this is a fun way to use the gear you already have or make a small investment in gear, to create a fun and creative art. Make sure to tag me in the student group if you try any of these new techniques, I cannot wait to see what you do.
For more information on the Sol45, visit: Lensbaby.com
Be sure to follow Steph on Instagram for more inspiration.
Want to become a leader in the Unraveled community? Learn more about becoming an Unraveled Expert Artist.